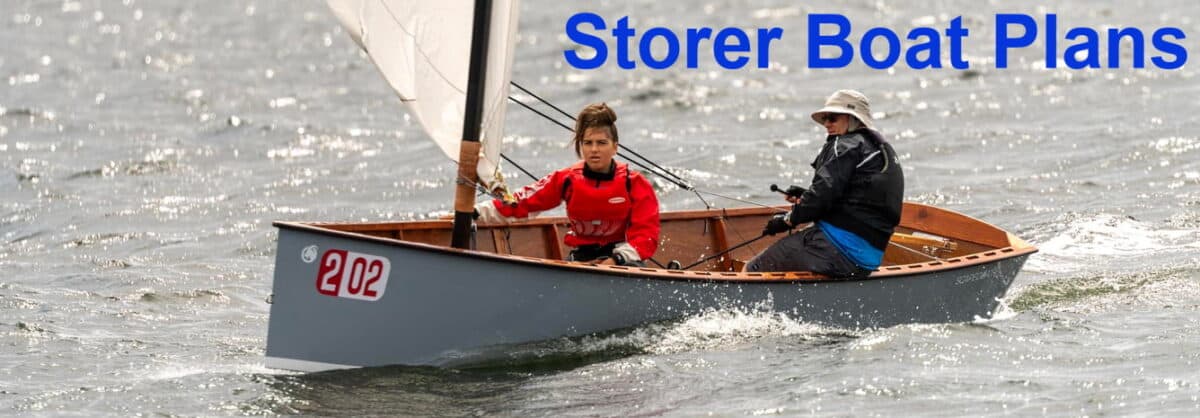
Our day actually Sailing DIY hydrofoil stabilisation on a small dinghy required getting the core design details right so you can build your own foil setup. But what was the sailing experience actually like? Some lessons learned, some success and some failure.
Also how to compare hombuilt foiling projects and prevent reinventing the wheel.
This is part of a two part article
- Part 1 – Building Details of the DIY hydrofoil stabilised Dinghy.
- Part 2 – Actually Sailing the DIY Hydrofoil Stabiliised Dinghy
See part 1 for construction.
Setting up the boat for the first trial of the DIY hydrofoil.
The 8ft boat was set up with the full Oz Goose Rig of 89sqft (a bit over 8sqm).
I had to cheat with the rudder mount I didn’t have the right fittings so I used a piece of wood perpendicular to the transom to mount the rudder. A bit like an extension. I didn’t glass it to prevent splitting which was dumb.

This is just about the worst possible hull for this experiment – but it still worked.
Aim is not pure speed, but to reduce the need for hiking … and a little speed bonus for a very short boat!
The original sail was meant to be about 45 square feet – as a kids trainer. We have moved it from that purpose because the available plywood was terrible to bend into the cockpit shape. The original idea was that it would provide enough stiffness when bent to provide a strongback when the bulkheads were attached.
You Should have heard the swearing. In Both English and Tagalog!
And because the boat was designed for a smaller sail the sail centre was well behind the centrecase – so I expected severe weather helm. I’d sailed boats like that before with aft cranked rigs – like the hobie 16 and a couple of homebuilds. It does make sailing a bit tricky where the sail has to be released until the bow points at the angle for a new tack or it will happily sit head to wind pulled on prematurely.
You can see the Hobie Sailors nodding their heads.
As to the length of the foil. Yes, it is far too long. but it does allow adjustment or fitting to other boats. There’s no problem if there is some sticking out to windward when trying to optimise it.
The Sailing Conditions to test the DIY Hydrofoil

Day was light to moderate and there were about five Oz Geese out with the same sail area. I sailed out past the shoreside weeds with the foil out to windward so as not to get snagged.
The cockpit was awful – another good reason to adapt the boat to become an experiment. I just kept sliding around.
At that point the rudder mounting block decided to split so I had a wobbly rudder.
The day was not shaping up well. But in for a penny, if for a pound.
Sailing Experience DIY Hydrofoil Stabilisation and Righting Moment
I reached out and pushed the foil to leeward. I didn’t have a GPS aboard. Only the longer Oz Geese to compare to.
I watched fascinated as even at these relatively low speeds the foil generated a hollow on the surface of the water. Allowing it to come too high resulted in lot of turbulence just before it broke the surface. Even at a decent heel with the tip 18″ underwater the depression on the surface was obvious.
There were gusts coming through regularly. Around 10 knots or a little more
When the first one hit the boat started heeling. With the slippery cockpit and nothing to hold onto (there is an idea) there was no way I could get up to the steeply inclined windward side, so I eased sail and the boat accelerated … and magically the heel disappeared.
The reason for this is obvious. The angle of attack is not changing so the lift is proportional to speed. But it is an exponential increase in lift – literally.
Say I was sailing around 4 knots – that is 4 squared = 16 units of hydrofoil lift. Hit 5 knots and now there is 25 units of lift. Which is just short of a 60% increase in lift.
Flying the homemade hydrofoil through the water
For those who live in excessive hope there was no intention to get the boat lifting out of the water, but let me explain.
It was so much fun. Even on this short stupid boat.
It felt literally like flying – just watching the foil under the water to keep it a constant height. No hiking involved.
- Foil goes down in gust, ease sail, speed increases, foil lifts up, sheet goes on and speed goes up more
- Foil comes up in Lull, ease sail momentarily or lean shoulders to leeward to keep it below the surface, after a moment the foil depth stabilises and sheet in gently and move shoulders in.
I was gradually winding up to upwind angles and I didn’t seem to be losing too much on the Oz Geese. But the thing was they were sitting on the windward deck (pangs of jealousy) and dropping their shoulders out into a semi hike in the gusts. I was sailing at the same angle of heel sitting in the middle and sometimes to leeward (unintentionally) in that awful cockpit.
So that was interesting.
Whither from here with homemade hydrofoils to augment stability
OK … so a limited sail in the terms of enjoyment – because of that awful cockpit and the broken rudder but what did I think.
The main thing was that an 8ft long training dinghy is just too too slow.
I’ve spent a lot of time in sailing canoes and wondered what if a lateral foil was used on a faster sailing boat. A slender boat which less stability – like a body hiked sailing canoe. I’d probably want to go to a 200 or 220 wide foil with a bit more glass for a less wetted surface.
In that wind a sailing canoe would have started at 5 knots and up to 6. 6 knots would more than double the lift from the foil. That would be fun.Why I am interested in homemade Foils 1; Demystifying materials for hydrofoils
OK, the image touts my own products but there are LOTS of possibilities of fast fun boats.
Why Build Foils: Affordable Materials for Hydrofoil Stabilisation
Why do we all think of foils being in carbon and being expensive and coming out of factories somewhere. They are also milling them out of steel.
It doesn’t need to be that hard. Or that expensive!
All of the control work for flying foilers was done in moths using timber, glass and a bit of stainless steel or carbon. It doesn’t have to be expensive. and the boats foiled reliably and fast.
Carbon does open up even more performance, but we never really saw exactly the endpoint of homebuilt foiling dinghies. If only there had been a class for those with budgets and those who wanted to tinker in their garage without having to mortgage the house to buy a boat that cost more than their car.
I imagine a constructor’s class for the international Moth. The revival of the Australian Scow Moth has been built on home built boats as has always been the case. It was that group of smart tinkerers that developed foiling before moving to three or four factories worldwide.
As a designer it would have been hugely interesting to see where real thinking rather than big budgets could have gotten to. Thinking is real technology. Making out of carbon or steel is materials substitution and is a lot less smart. (not that it is unsmart – but it came from original thinking of guys and girls in garages.
Why I am Interested in homemade foils 2; Keeping people sailing as they get old
Ok … I’m not young any more. I’m writing this about 6 years after sailing the little foiler.
The big learning there was – a dinghy where you don’t need to hike athletically but is still intellectually stimulating to sail.
We could sail narrower boats and fly a foil to leeward for stability. No transport worried. More chilled out physically, but so much fun with a new set of “flight controller” skills to develop.
Easier but not dumbed down or slow.
I’d rather sail a light simple fast boat where I don’t have to hike much. I’d slit my throat before giving up sailing.
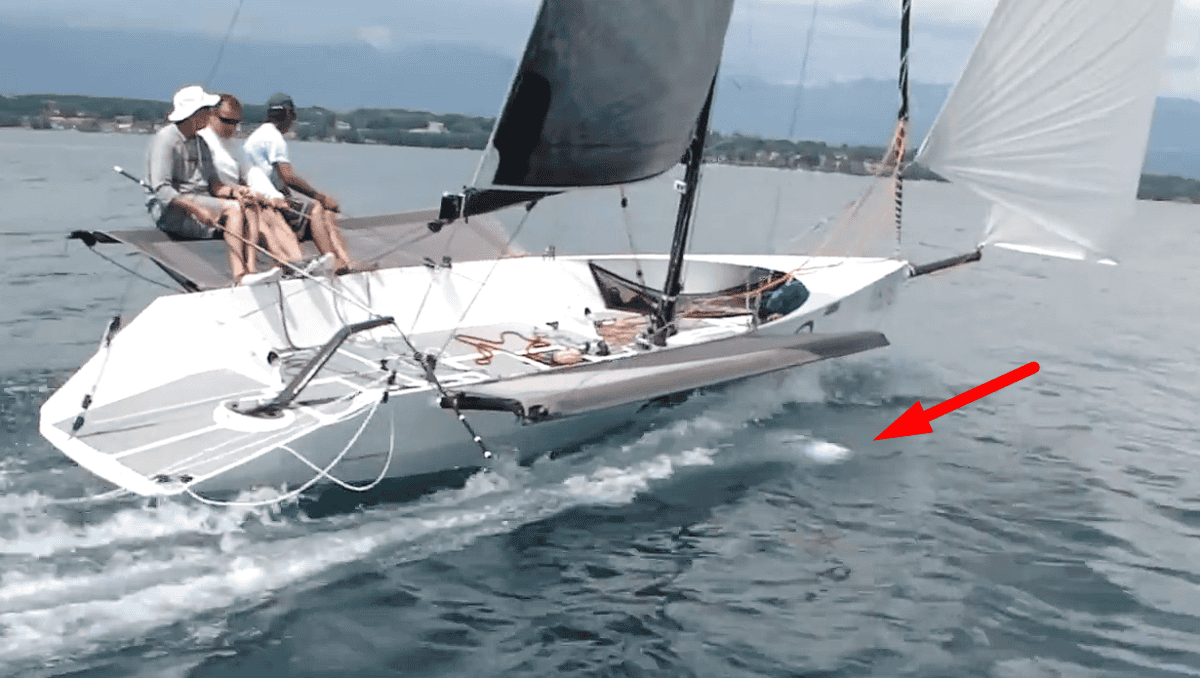
Here is an image of the Quant 29 developed by Michael Aeppli and Hugh Welbourne. It is a big boat in decent wind. Most boats this size would have 5 or 6 crew on the gunwale. here it isn’t needed.
The Advantage of working from a Common Base
No problem if you want to go another way using this basic information.
But the reason for using a common setup is the synergy it creates. Otherwise each developer continuously reinvents the wheel..
But in a few short years the Moths cracked all the serious problems and are among the few boats that will foil in light winds and in all directions.
Monohulls
Monohulls only for stabilising foil.
Hull to be a monohull with no hollows in the hull surfaces intended to provide a multihull effect.
Sub Classes
A cheap class with a limited length range. A more expensive class for wider experimentation.
- Class Lateral Foil A – 8 to 12ft long.
- Class Lateral Foil Open – Any lengths outside the “A” range.
Hydrofoil Construction
Foil to be wood construction. No carbon, kevlar or other exotics, no foam construction. Can be hollow ply if you dare. The aim of this rule is twofold. To keep the cost down and to limit the technical development – and in particular to prevent the foils becoming too thin and sharp.
Vacuum bagging, resin infusion and other methods are disallowed.

Any updates?
Have to get them up. Some video and pics.
MIK
hi Mik
Cant see how you control the lateral position of the foil?
Im assuming it slides out to leeward on each tack?
How and what secures it in place?
Ta Wayne
Fremantle
Hi Wayne.
It just pushes through by hand. It is such a long case and it only takes a little load to make it difficult to slide.
Plus it is buoyant so the boat would have to be lifted out of the water before it would fall out.
I have capsized with it and it rose up in the case.
It could be different if it was a vacuum infused solid carbon foil. They sink when they fall off your boat.
MIK