Epoxy that has not cured is a problem most of use come up against at least once. However it is unlikely to happen a second time as it’s operator error in 99.9% of cases. So what are the typical mistakes?
We learn from our worst mistakes!
Richard wrote to me asking why his epoxy was still soft 3 days later. He suggested it might be because of one of:
1. The immediate guess is that it’s been too cold and wet and the poxy just needed more time to set. Possible, though with two days under its belt, I’m wary – guess I’ll know by sunday.
2. I did have to do a second mix so perhaps I cocked up the mixture – I weigh my poxy rather than use the pumps so the mix is usually accurate … unless I mess up the maths.
3. The third possibility is this one – the mast and spars were made out of oregon. These were shaped and sanded late last year, and left to sit until now. Resin had exuded from the timber over that time – the timber was covered in little balls. It sanded off nicely, but would this have affected the poxy?
I’m betting number two … and guess I’ll know by sunday. Anyone else like to make a guess? Especially about the resin theory.
Richard
I replied,
Hi Richard,
It is down to number 2.
For it to cure on some parts but not others ALMOST certainly indicates either that the poxy either
- wasn’t measured properly
- wasn’t mixed properly
As far as a problem of manufacture – I have never seen epoxy not cure for this reason. People generally swear on a stack of bibles that they did everything perfectly (me too!!) but when they mix up another quantity carefully from the same containers the see that it goes off fine (me too!!!)
The effects of surface contamination – won’t stop epoxy from curing.
The surface that you put it on can effect the surface FINISH hugely – if there is contamination you can end up with greater or smaller amounts of fish-eying – where the poxy refuses to wet the surface evenly so pulls back from some areas and piles up in others – but it always goes off.
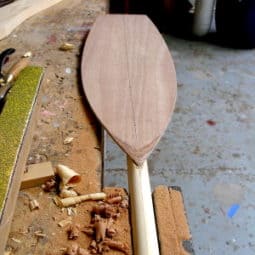
Fish eyes mean contamination either from waxing or other sources. But the epoxy cures just fine in that case. Photo below

The one exception I know of was when someone used vinegar to clean off the brushes. Use disposable brushes or sit them in acetone overnight. Vinegar is really useful for getting epoxy off yourself or off hard finished tools. But the tiniest amount of vinegar or other acids will stop the epoxy reaction dead in their tracks.
There is a small chance that something else could have happened but in thousands of batches used and tens of thousands of batches sold almost every problem has come from not mixing or measuring carefully – and the same materials work fine the next time round when more care is used.
Too much hardener or too much resin?
Operator error is almost ALWAYS the source of problems. If using a scale check it with numbers of coins to see it is accurate. if using tins, mark the glue sticks used to measure the depth accurately.

The general rule of thumb is if you are down a little on hardener it is likely to cure EVENTUALLY – maybe a week, maybe a month maybe in 10 years. So it is a matter of how long you are prepared to wait before deciding to strip it all off
If there is too much hardener it is unlikely to ever cure.
There is a few percentage margin in getting the quantities right but we always tell people you have to be PRECISE – that way there will not be problems.
Can I put another coat on top with extra hardener – a hot mix
Nope – it is just a waste of even more epoxy and you will almost certainly have to scrape the whole lot off.
You can sometimes get away with this if doing polyester resin work – but polyester already has the hardener mixed in to the resin and the MEKP that you add is a CATALYST – tinyamounts of catalyst have a big effect. But the problem with the epoxy is there is NO HARDENER and no amount of extra coats is going to get the hardener where it is needed.
So putting an extra “hot coat” or “hot mix” over the top is really, really dumb and expensive. Also note that I have already mentioned that coats with more hardener are unlikely to harden properly too.
Removing part cured or tacky Epoxy
Sharpen up a cabinet scraper old bean and get the sludgy stuff off – maybe wait till Sunday just to get an idea of what is happening. Probably worth scrubbing the surface with a brush and acetone, letting it dry for a bit and poxying again.
Number of coats
BTW I am very unlikely to agree that one coat only is ever warranted. It is so easy just to put the proper 2 or three on at the same time.

One coat doesn’t give you any of the advantages of using epoxy – it will be a bit dry in some areas and you will sand through in quite a few places with the end result that you haven’t protected the timber at all.

You really need the two (or better three) coats to seal the surface and allow enough meat for sanding.
It is easy anyhow to apply in one process with no extra sanding
Wait for the first coat to go a reasonably tacky then roll on the second coat. And so too for the third.
As you complete each coat hold the roller so it cant rotate and slide it slowly and gently along the surface to slick it off – popping all the bubbles and getting rid of the texture left by rolling.
Summary
This might all sound rather cold and clinical, but I do feel for you – I have been there a few times. And it doesn’t feel better that it was my fault each time!!!