Instead of taking an old boat apart in a major resoration, why not just repair it the minimum amount and just go sailing!?
This strategy is worthwhile if the sailing season is in full flow and you want to be out there “doing it” in your sailing dinghy. It is not a sensible strategy if it is winter and you have time to do the proper repairs.

I am a great believer in speedy temporary, but workmanlike (workpersonlike?) repairs that will keep a boat going for the moment. I have seen many boats not too far from a working condition largely taken apart by overenthusiastic new owners resulting in several years delay on getting onto the water. In extreme cases the boat might never be back in usable condition again as all the parts get separated, lost, mislaid or you forget where they originally went.
The best way to preserve a boat is often to keep it sailing and spend money on the essentials to keep it in reasonable working order.
I have written before about my minimal approach to fixing up an older boat for immediate sailing – you can click on that link to read. Also I have put together a page detailing different levels of repair and different strategies that can reduce the necessity for pulling a boat completely apart. You can read many of the wooden or plywood boat repair procedures and strategies in that category on the new part of my website also my FAQ on boat repair, boatbuilding materials etc.
On the other side a specific repair can be quicker and easier to do the proper way in the beginning … but what to do when the whole boat is tired with a whole bunch of different problems?
This article is spurred by an email I received today from Melanie in the UK who has just bought her first sailboat – and the weather has just become nice enough to really enjoy sailing. The last thing she wants to do is to spend the good weather sanding and painting.
Dear Michael,
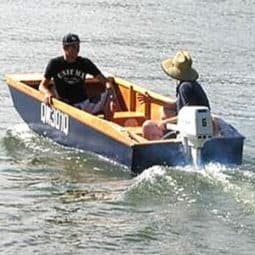
I am a complete novice/sucker that just spent £300 on an elderly mirror dinghy and trailer. On taking it out for my first lesson, water came in a lot and in a bid to drain it out, I pulled out the plugs from around the sides(the flotation tanks?), more poured in. My tutor told me the self bailing thingy on the floor of the boat was painted shut, so I just bailed it out manually.In spite of this, sailing the “Sausage Jane” was a thrill for me and we went quite fast. Having got the boat back on dry land I can see a big crack and spongey bit on the side at the back of the boat, and the seams have lifted all around the inside.
I have been comforted by your philosophy of the boat being good enough, not perfect and I am hoping that it can be patched so that I may learn to sail in her. Is it worth repairing? I hope so! I would like to attempt to repair her myself. She has been painted over. What should I do about the spongey bit and the crack?
Should I start sanding that area down in preparation for filling? I want to use her this summer!
Any thoughts would be very useful thank you,
Melanie
This is my reply.
Hi Melanie,
It is always good to try and get a boat you are buying into the water – but I think you know that now. So let’s get on to what has to be done.
It sounds like there is quite a bit of work to be done on the boat. A first and useful thing would be to remove the paint so the self bailer works. These are very useful even though they only work when the boat is moving fairly quickly.
As far as the spongy bit goes you will have to do a repair eventually. I would just try to prevent it getting worse while you use the boat. This will means the boat will look a bit crappy and piebald after you do the repairs but it is temporary while you get on the water this season.
On land put a couple of buckets of water in the cockpit of the boat and see if any drips out of the centrecase area – where the centreboard inserts. Then lift the bow of the boat and see if any water leaks out the back of the boat. The trick is if you see water dripping off the boat inspect carefully where it starts coming through the hull. Mark areas clearly with a pencil
Get rid of the water and make sure the buoyancy tanks are empty too. Sponge them out if necessary.
I would remove the paint carefully with a hot air gun and a sharpened (with a file) triangular scraper. Be careful not to dig away at the plywood too much. It will be soft. Scrape the paint away so you are about 25mm onto solid timber around the soft spot. You will need to tell me how big it is and where it is. Check the inside and the outside to see if it needs stripping both sides – only if spongy.
The water dripping trick may have told you how water is getting in the boat. But you also need to check the joins between the plywood panels on the outside of the boat to see if there are any cracks. have a careful look. Sometimes there are cracks in the paint which are not a problem, what we are looking for are cracks in the glue joints. The way to tell if it is a crack in the glue joint is to put pressure (lean on it heavily) on the ply either side of the crack. If it opens up a little then the glue join is damaged. Mark any areas with pencil again.
You will need some 6ounce (200 grams per sq metre) glass cloth (even lighter cloths can be OK) big enough to cover the area. If it is bigger than 50 x 100 mm you will need enough glass cloth for both sides. Normally the cloth is about a metre wide and you can buy it by the metre or half metre
With removing paint you have to be VERY DISCIPLINED – the temptation is just to do a little bit more and then a little bit more – this is what makes the job grow until it becomes too big. Stick with your original decision unless you see that the join is broken more.
Do the inside of the boat looking for areas where the buoyancy tanks meets the sides of the boat. – structural cracks there will have to be fixed too.
The ply joins will have to be fixed with 50mm wide glass tape and epoxy resin. I would buy a litre of WEST or System 3 epoxy (common brands around the world – add Bote Cote in OZ) if the areas are small but double that if they seem large. – online or from a boat chandlery and as many metres of glass tape that you think you need. Strip the paint off the problem area along the joins and remove the paint back to about 50mm either side of the crack.
Allow the plywood to air dry for a couple of days. Sand the areas using 150 grit sandpaper and a Random Orbit or orbital sander. Just so the wood is clean and the corner is about a 4mm radius. And email me if there was a leak around the centrecase. We will need to discuss that more.
I would do the inside of the boat first. Cut the glass tape and cloth to length and follow the instructions on doing small areas of fibreglassing on my FAQ/Q&A website page. Make sure the epoxy is brushed on to protect the wood. When the inside is done you can flip the boat over and do the outside as well. Smooth down the glass edges the next day and sand so the transition between the rest of the hull and the glass tape is not too untidy. Do not use a powersander around the corners it will cut through the glass immediately – these have to be gently hand sanded.
The whole surface should be a non shiny matte surface. Then paint with some household paint about the same colour as the rest of the hull and go sailing for the rest of the season.
I will put this conversation up on my website so it will help others. You can ask questions or comments there too.
Best wishes
Michael
Another email exchange …
Hello, have examined “SausageJane”, (name not my idea), my mirror, undid the back top of the flotation tank as it was rotten, paint all peeled off in one strip and underneath wet ply with big crack in. Pierced through the crack to look at bottom of the boat and, horror of horrors, there’s a spongey wet patch with a crack/hole in it, right through the bottom of the boat.
There has been water pooling around the centre board for a week and it hasn’t seeped through the bottom of the boat, so that hopefully means there’s no leak there at least. Apart from the bottom hole and crumbling sponginess of the backcorners, there’s just the seams along the top of the boat where the flotation tanks meet the rim of the boat to restick. So, spongey bottom, not good!!!
will re read your helpful advice and try to force my dad to help me mend her. if you have anything to add, that would be great thank you,
kind regards,
melanie
Is there an inspection port in one of the bulkheads near the crack in the bottom? ie a plastic screw in cover about 100mm or more in diameter?
In other words can you get to the back of the crack inside the buoyancy tank. Don’t pull things apart until you have a repair strategy!!!
If you can reach the back to remove paint and then epoxy some glass tape on both sides of the crack and the boat will get through to the end of the sailing season and you can fix it in winter.
If you can’t get to the back or it is too far out of reach of an inspection port then a proper repair might be the best way.
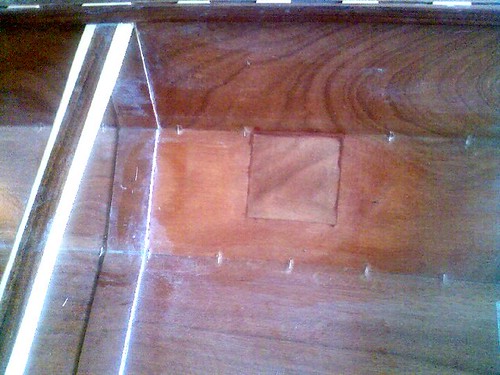
You carefully mark a neat rectangle for the repair .. a bit like the drop injury on this page
How to repair and improve Plywood Boats – Dents, holes, replace bottom in 24 hours, making paint and varnish non skid
You need to remove the paint from around the hole inside and out to a distance of about 25mm. Cut a patch piece of plywood for the inside of the hull – it needs to be bigger than the hole and overlap onto the surrrounding ply by 25mm. Then cut a piece of ply to match the size of the hole you have cut. The bigger bit goes inside the hull and hold it in place with plasterboard/drywall screws – they will pull it down against the hull. The smaller one fills the hole. Fill any remaining gaps with epoxy. Sand the outside area very hard and then put a cut piece of glass cloth about 25mm larger than the small ply patch on the outside with epoxy. I think the method is in the link above for the glass on the outside.
Best wishes
Michael